Codex Quick Start Guide
Prerequisite: Install Node.js
Codex requires Node.js. Please refer to the Node.js Installation Guide to install and verify.
Easier Way: Auto Config
If you don't want to install manually and configure each file, use the Auto Config Tool.
macOS / Linux:
curl -fsSL https://relay.upthos.com/auto-config/install.sh | bash -s -- --tools codex
Windows PowerShell:
irm https://relay.upthos.com/auto-config/install.ps1 | iex --% --tools codex
1. Install Codex
# Windows
npm install -g @openai/codex@latest

# macOS / Linux
sudo npm install -g @openai/codex@latest
Verify:
codex --version
A version number indicates the installation succeeded.
2. Create an API Key
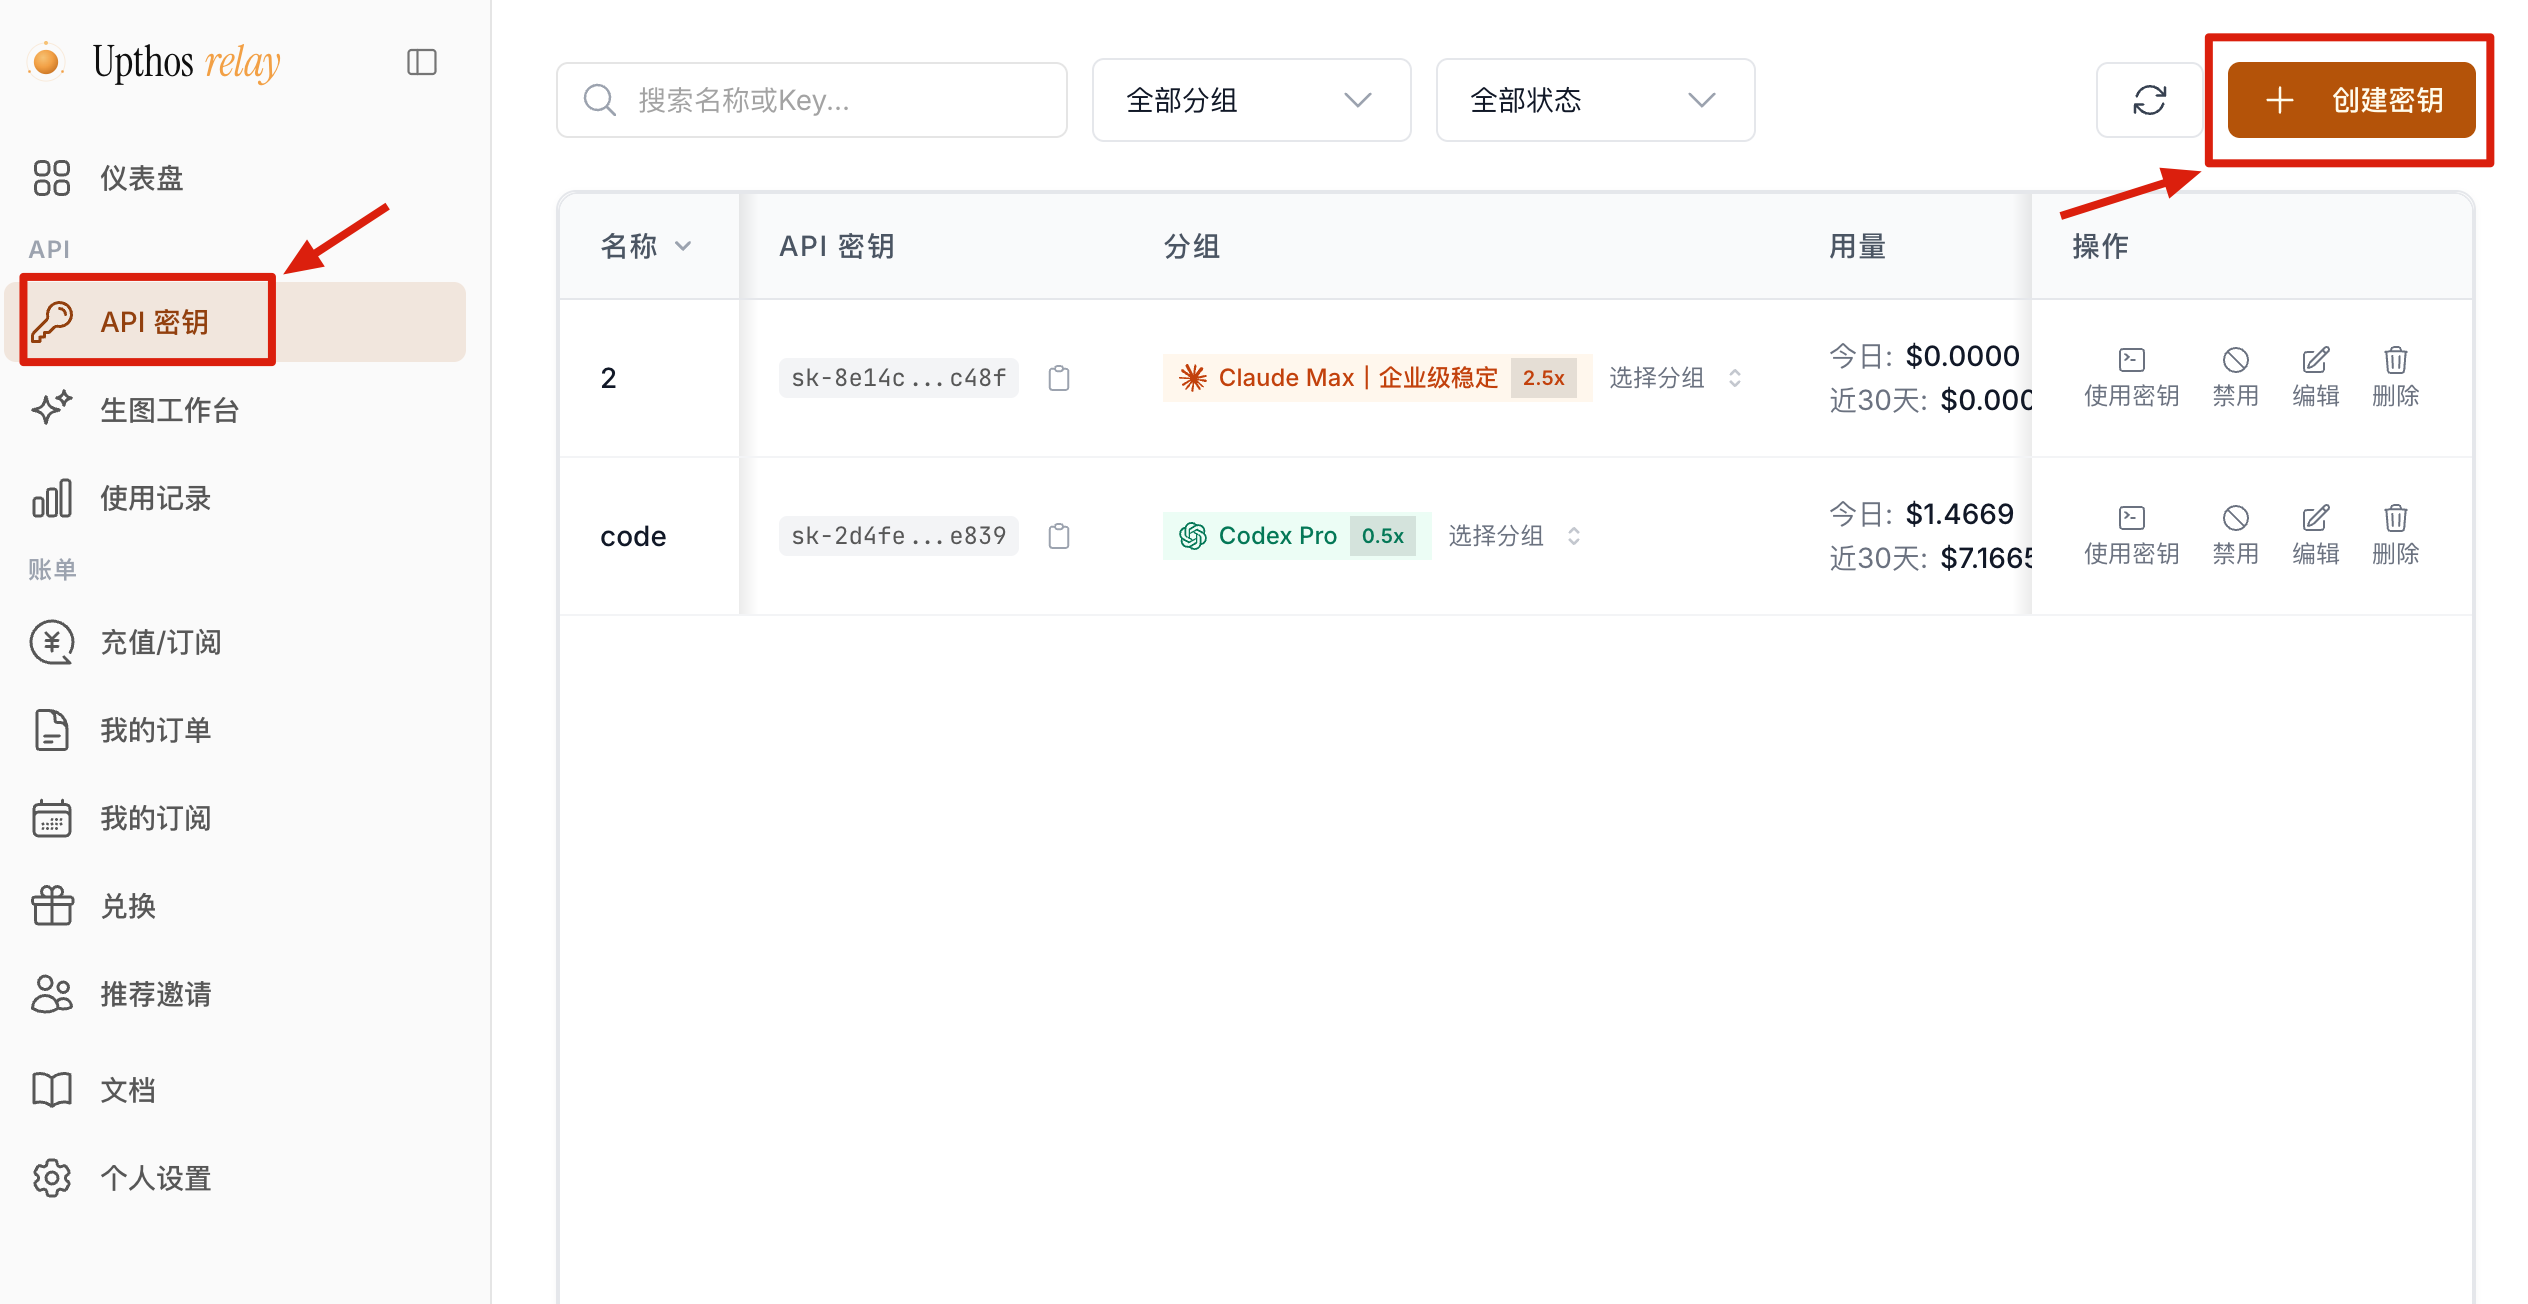
Log in to the Upthos Relay Console, go to API Keys, and click Create Key.
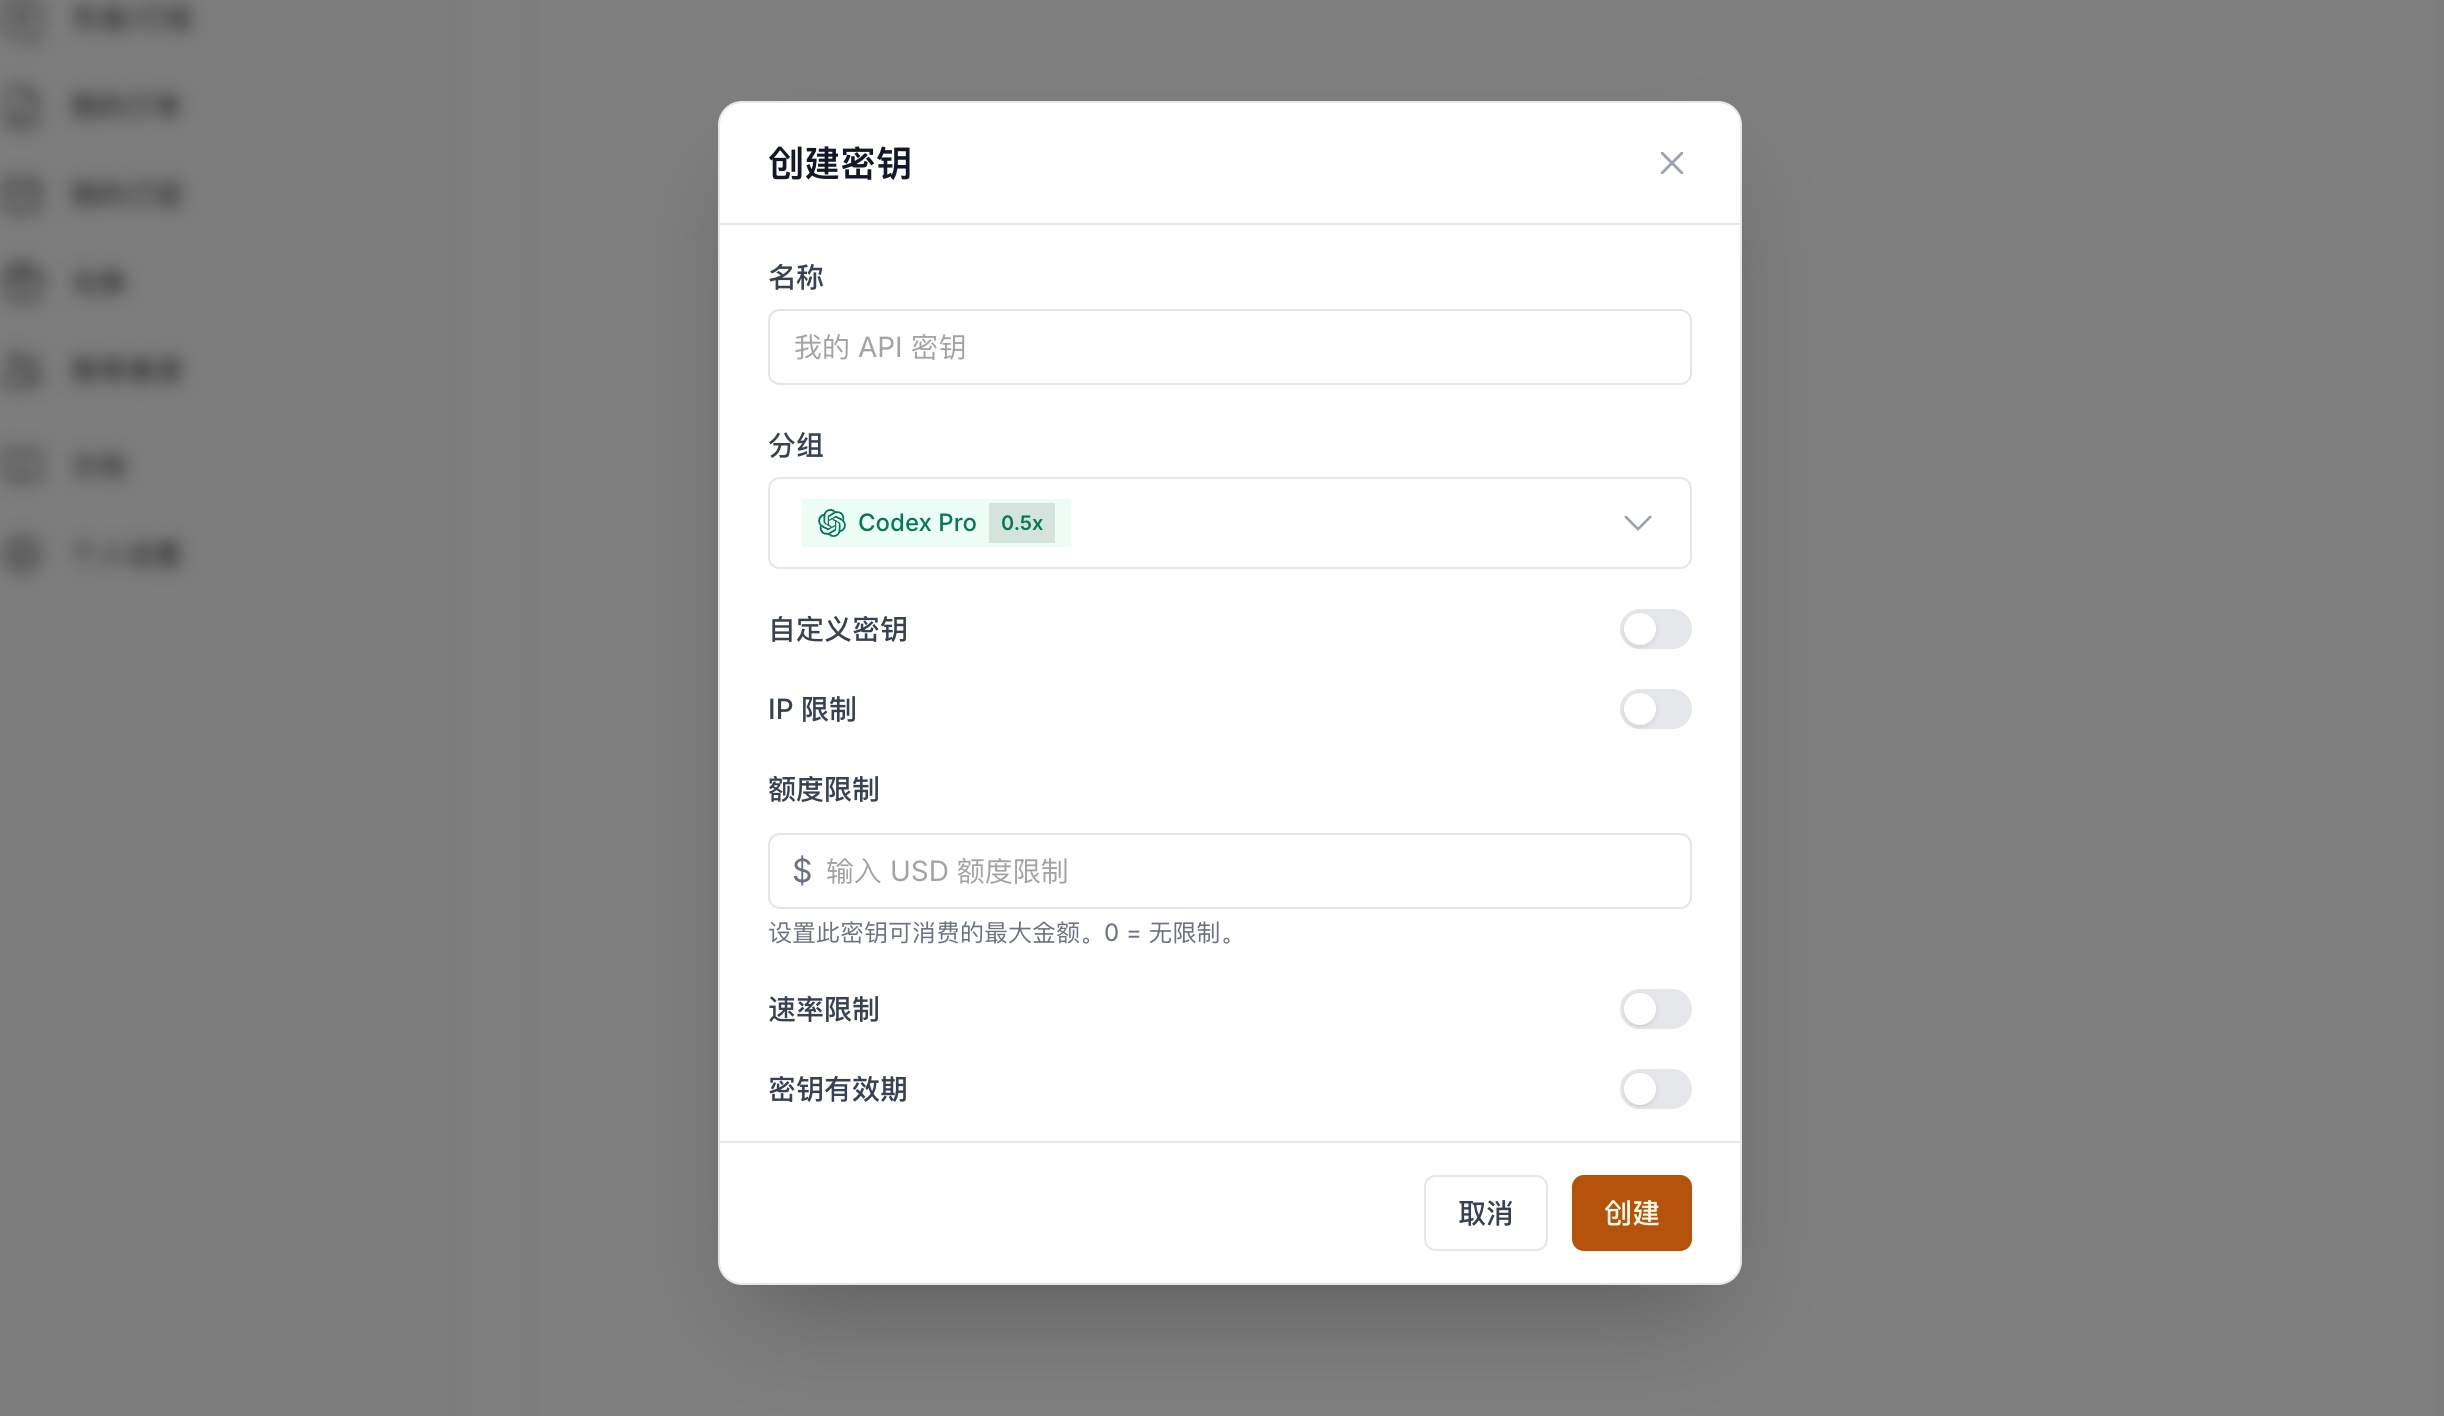
Fill in the key name, select a Codex group (model and rate), and optionally configure IP restrictions, quota limits, rate limits, and expiration.
Beginners: just use the default settings.
Security Note: Your API Key is equivalent to account credentials. Keep it safe and never commit it to a code repository or share publicly.
3. Import Key to Codex
We recommend using CC Switch for one-click configuration, or you can create config files manually.
Option 1: CC Switch (Recommended)
Download and install from the CC Switch Releases page.
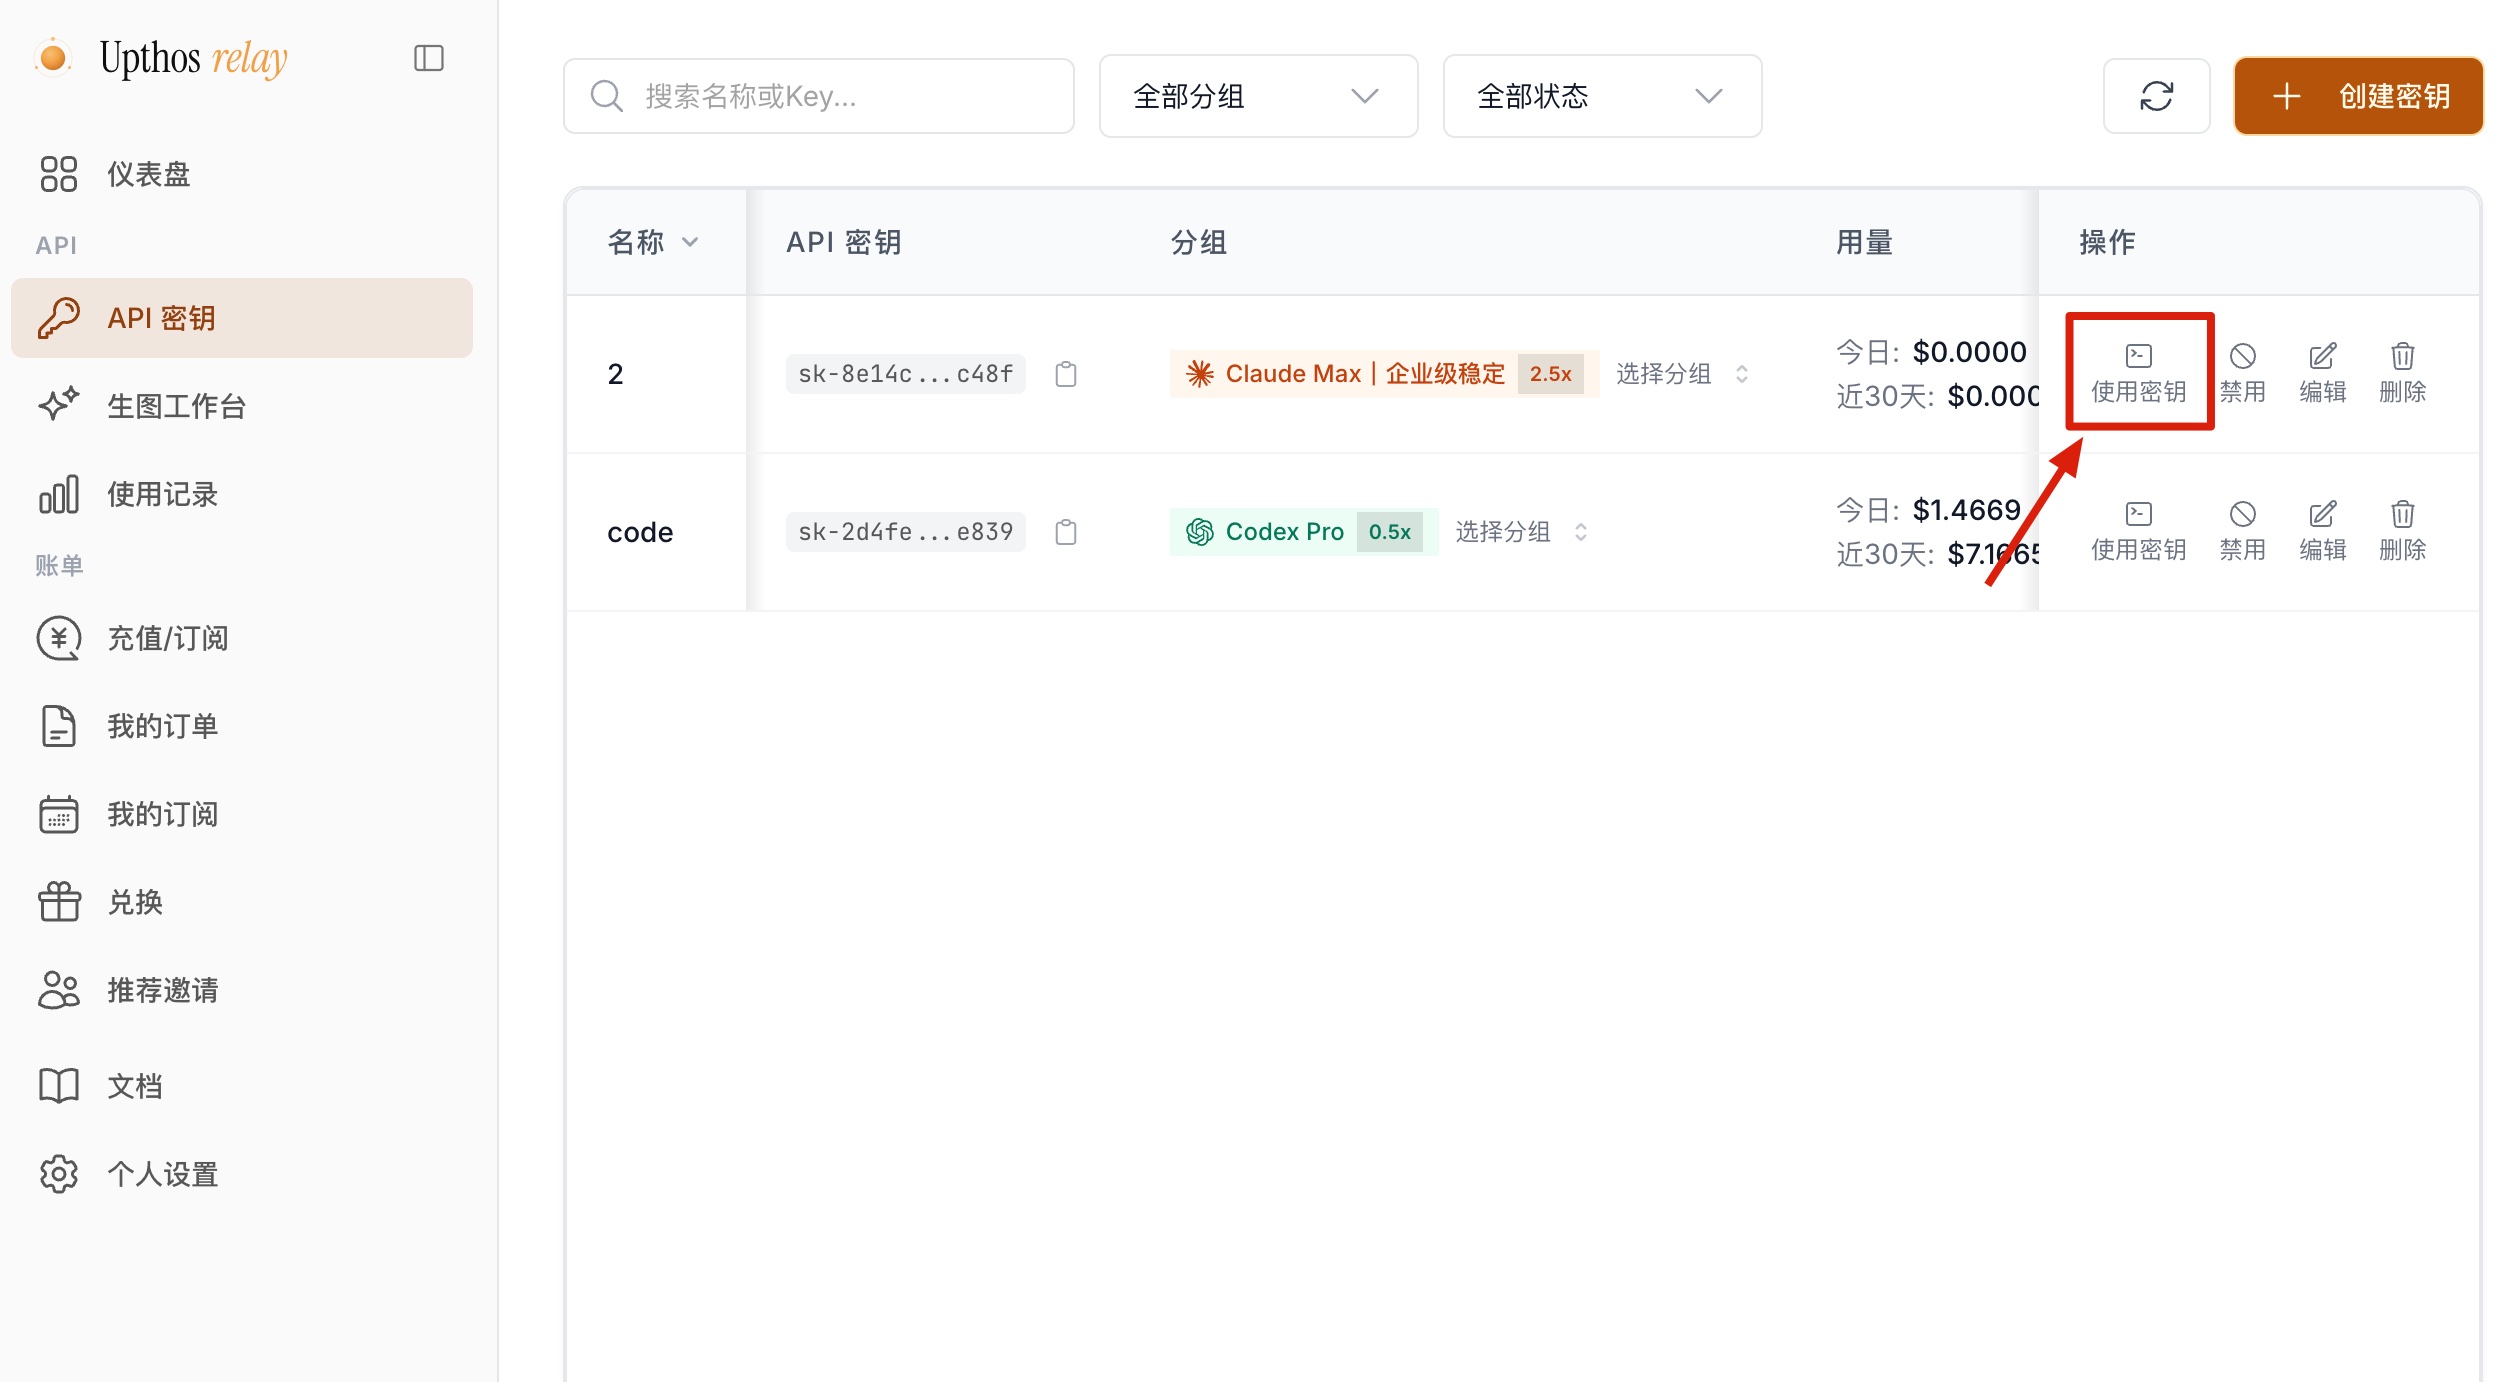
Click Use Key:
Click Import to CCS:
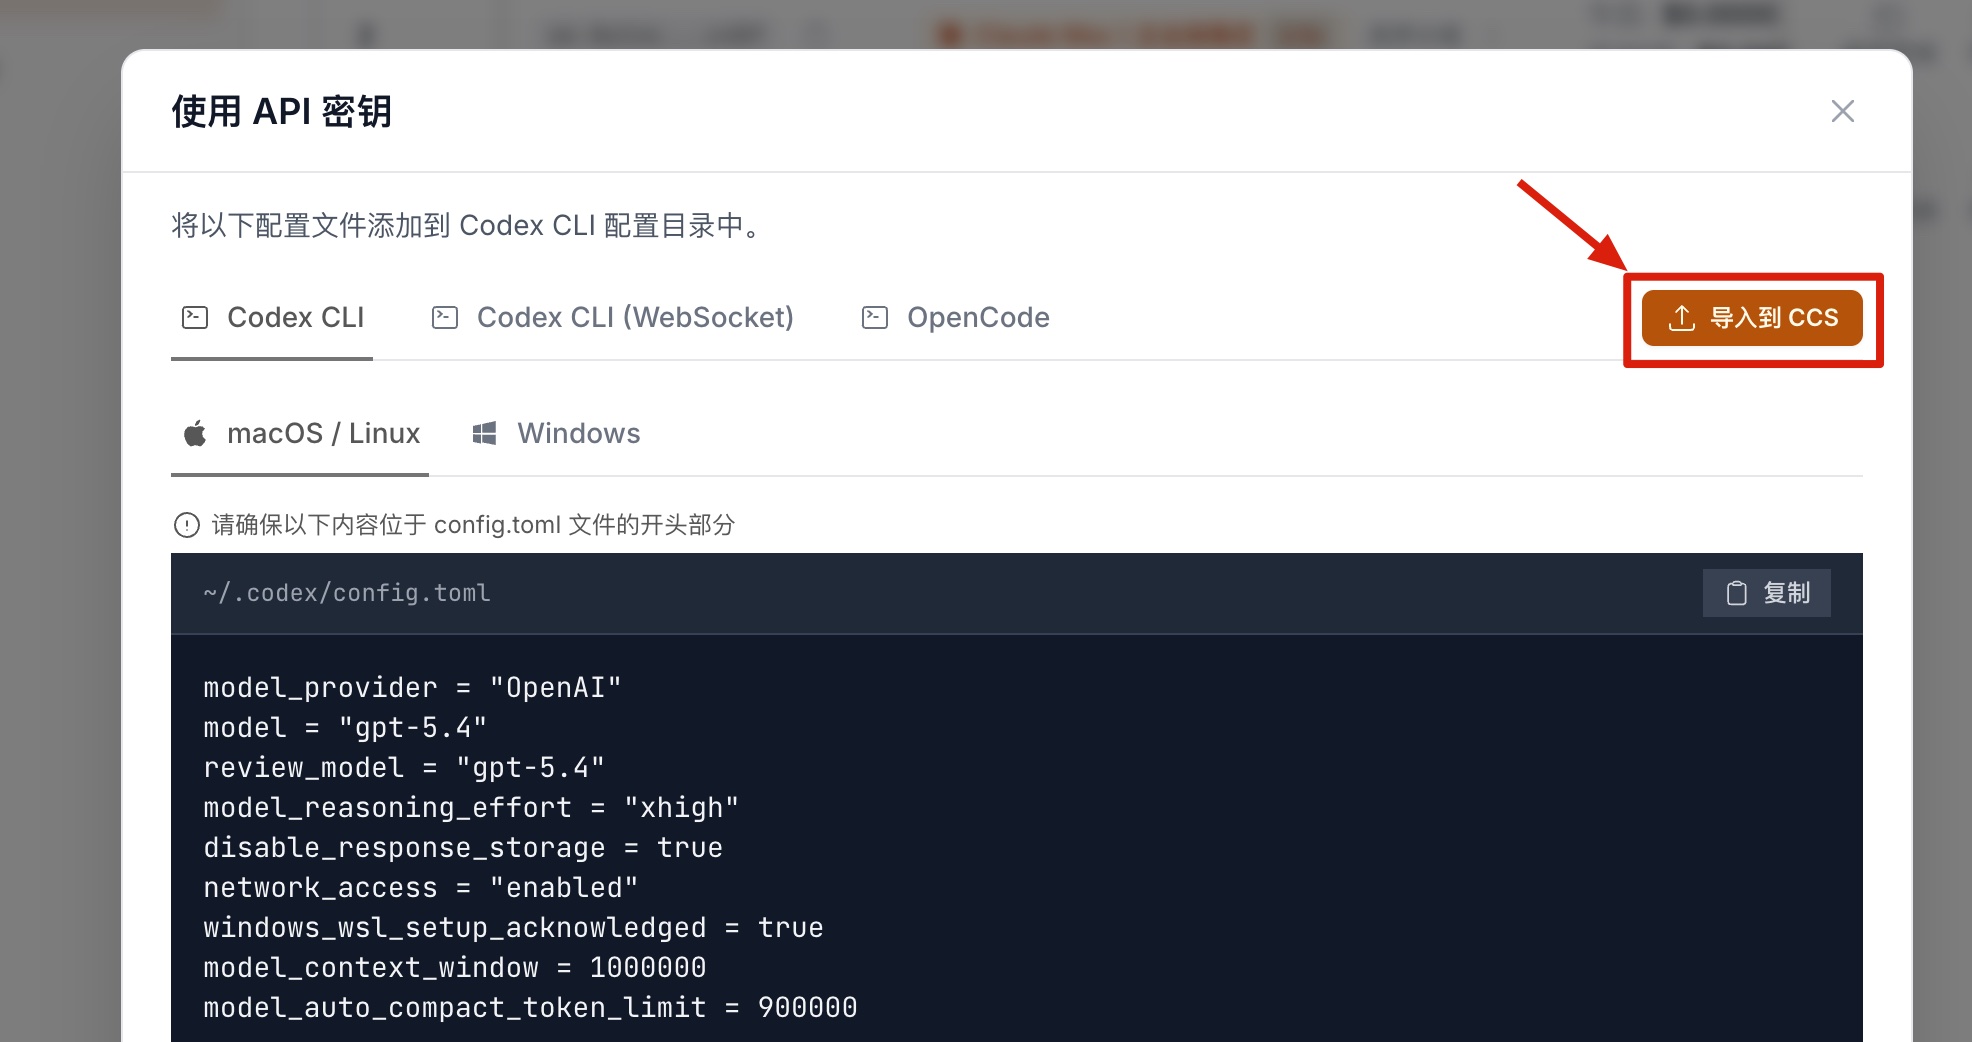
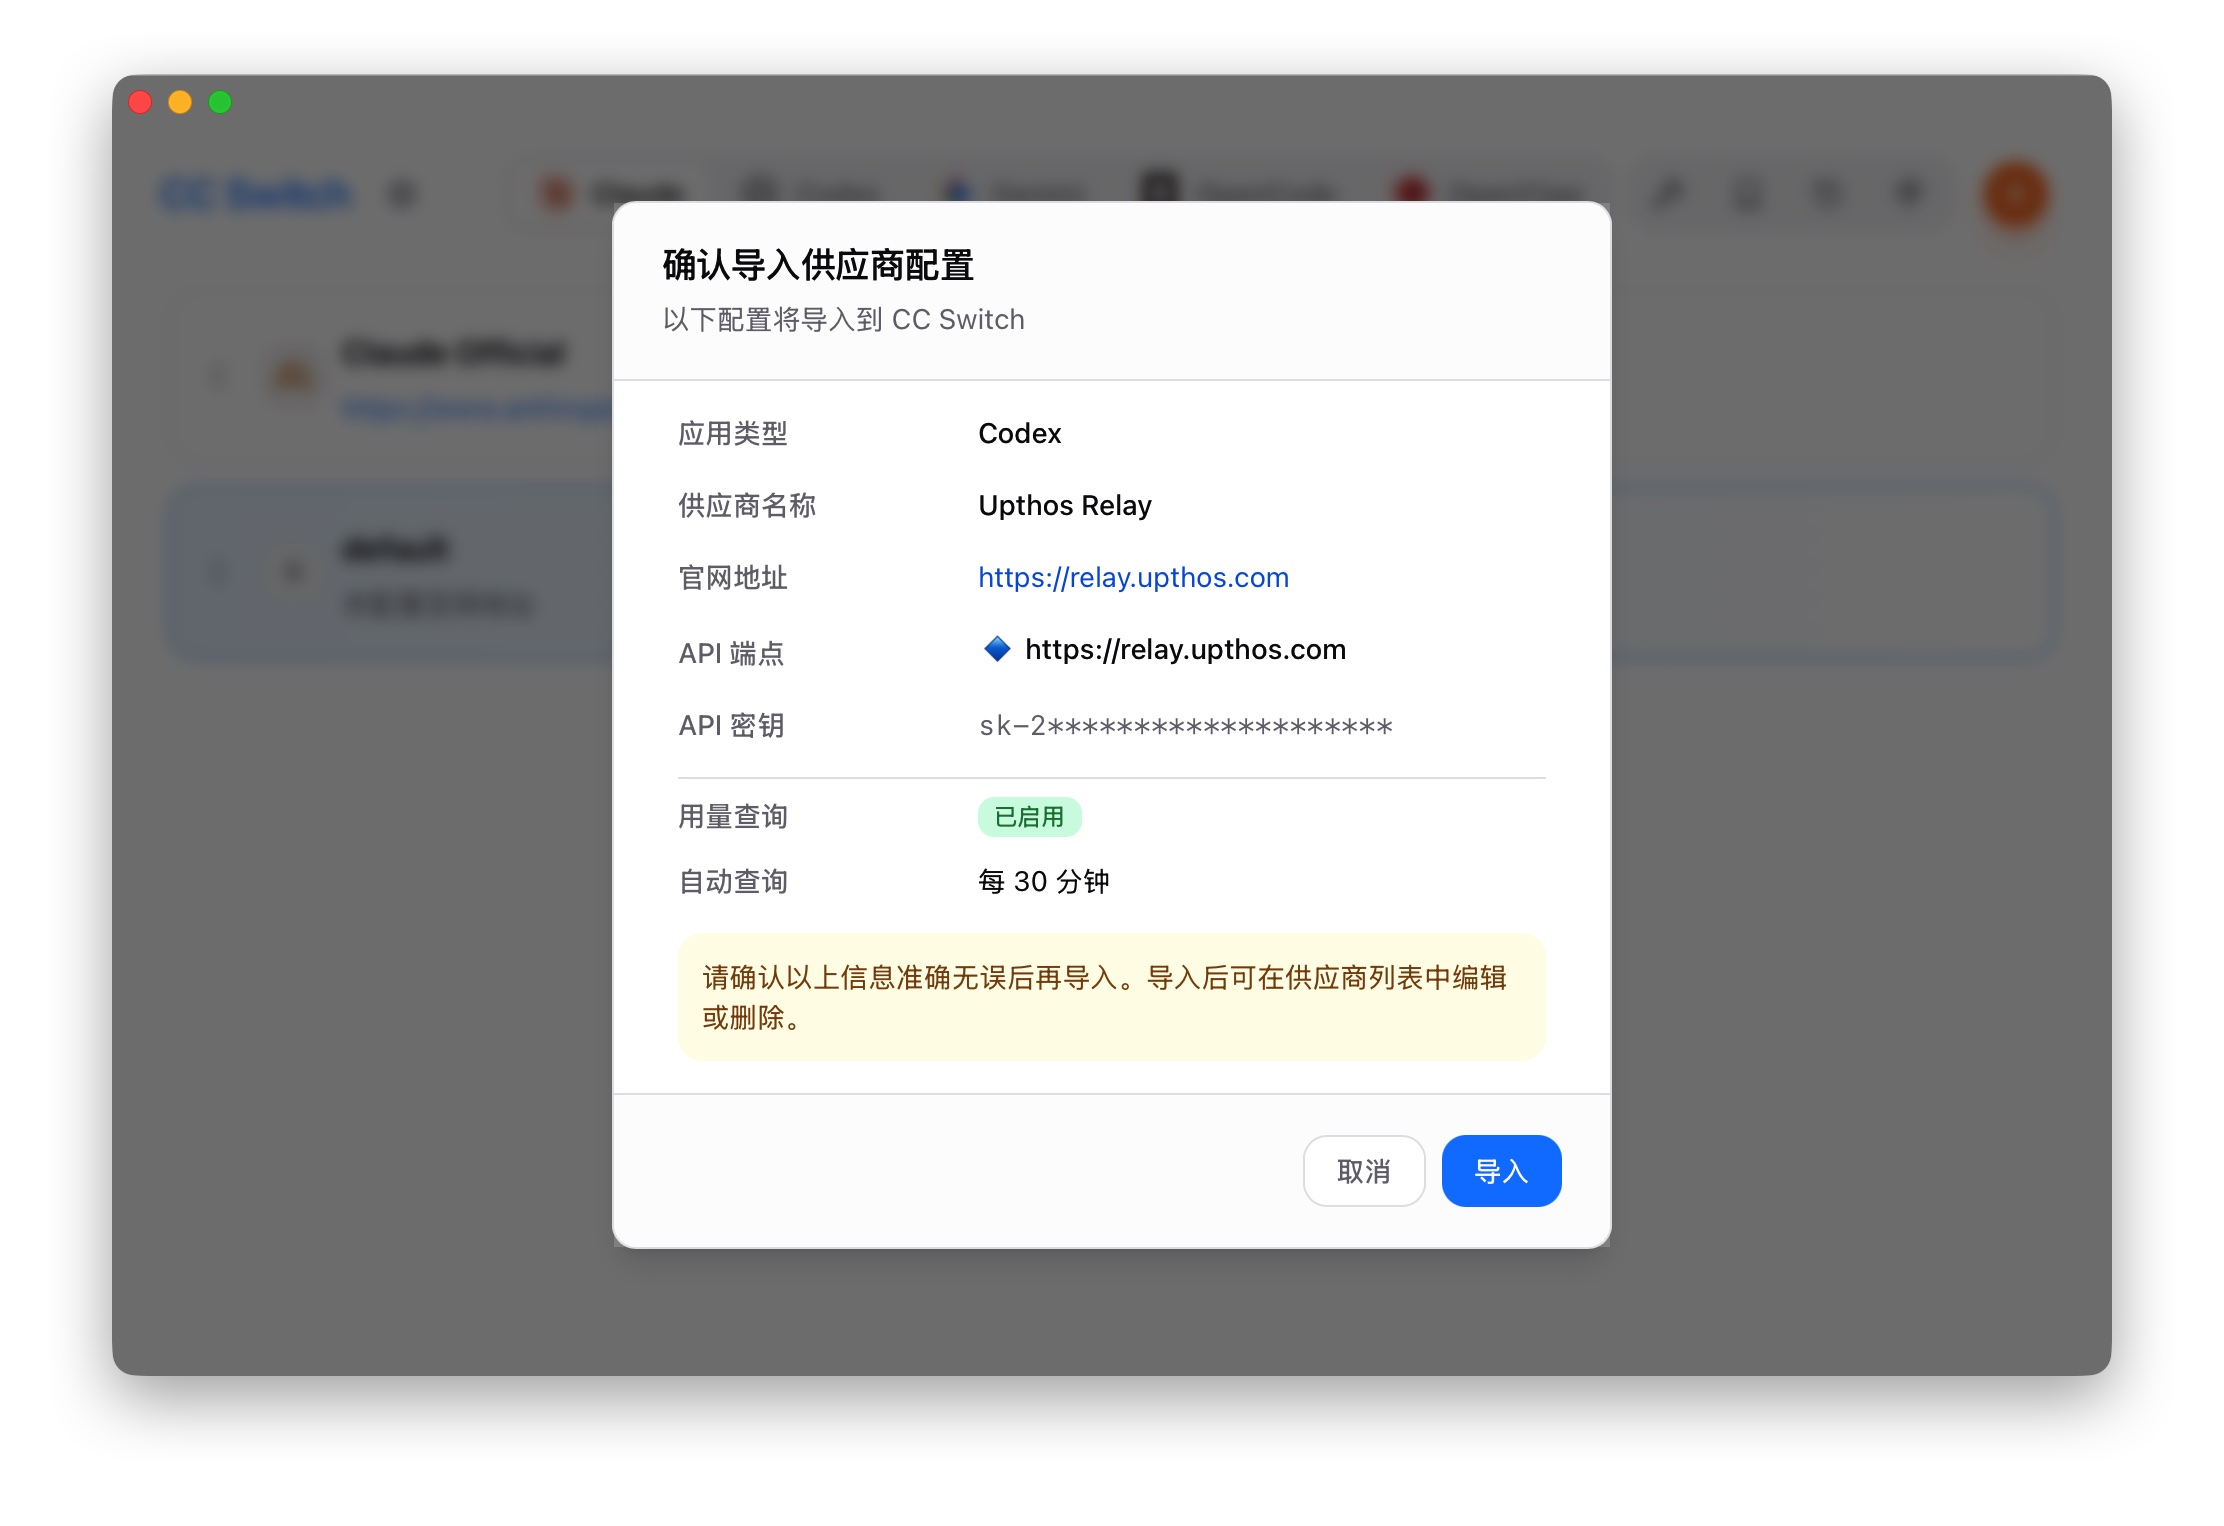
In the CCS dialog, click Confirm Import:
Option 2: Manual Configuration
Create config directory
# Windows (PowerShell)
if (Test-Path "$env:USERPROFILE\.codex") { Remove-Item -Recurse -Force "$env:USERPROFILE\.codex" }
mkdir "$env:USERPROFILE\.codex"
# macOS / Linux
rm -rf ~/.codex && mkdir -p ~/.codex
Create config.toml
Create config.toml in ~/.codex/ (Windows: %USERPROFILE%\.codex\):
model_provider = "upthos"
model = "gpt-5.6-sol"
review_model = "gpt-5.6-sol"
model_reasoning_effort = "high"
disable_response_storage = true
network_access = "enabled"
windows_wsl_setup_acknowledged = true
model_context_window = 272000
model_auto_compact_token_limit = 272000
effective_context_window_percent = 95

[model_providers.upthos]
name = "upthos"
base_url = "https://relay.upthos.com"
wire_api = "responses"
requires_openai_auth = true
supports_websockets = false

[features]
goals = true
Create auth.json
Click the Copy button next to your key to get the API Key:
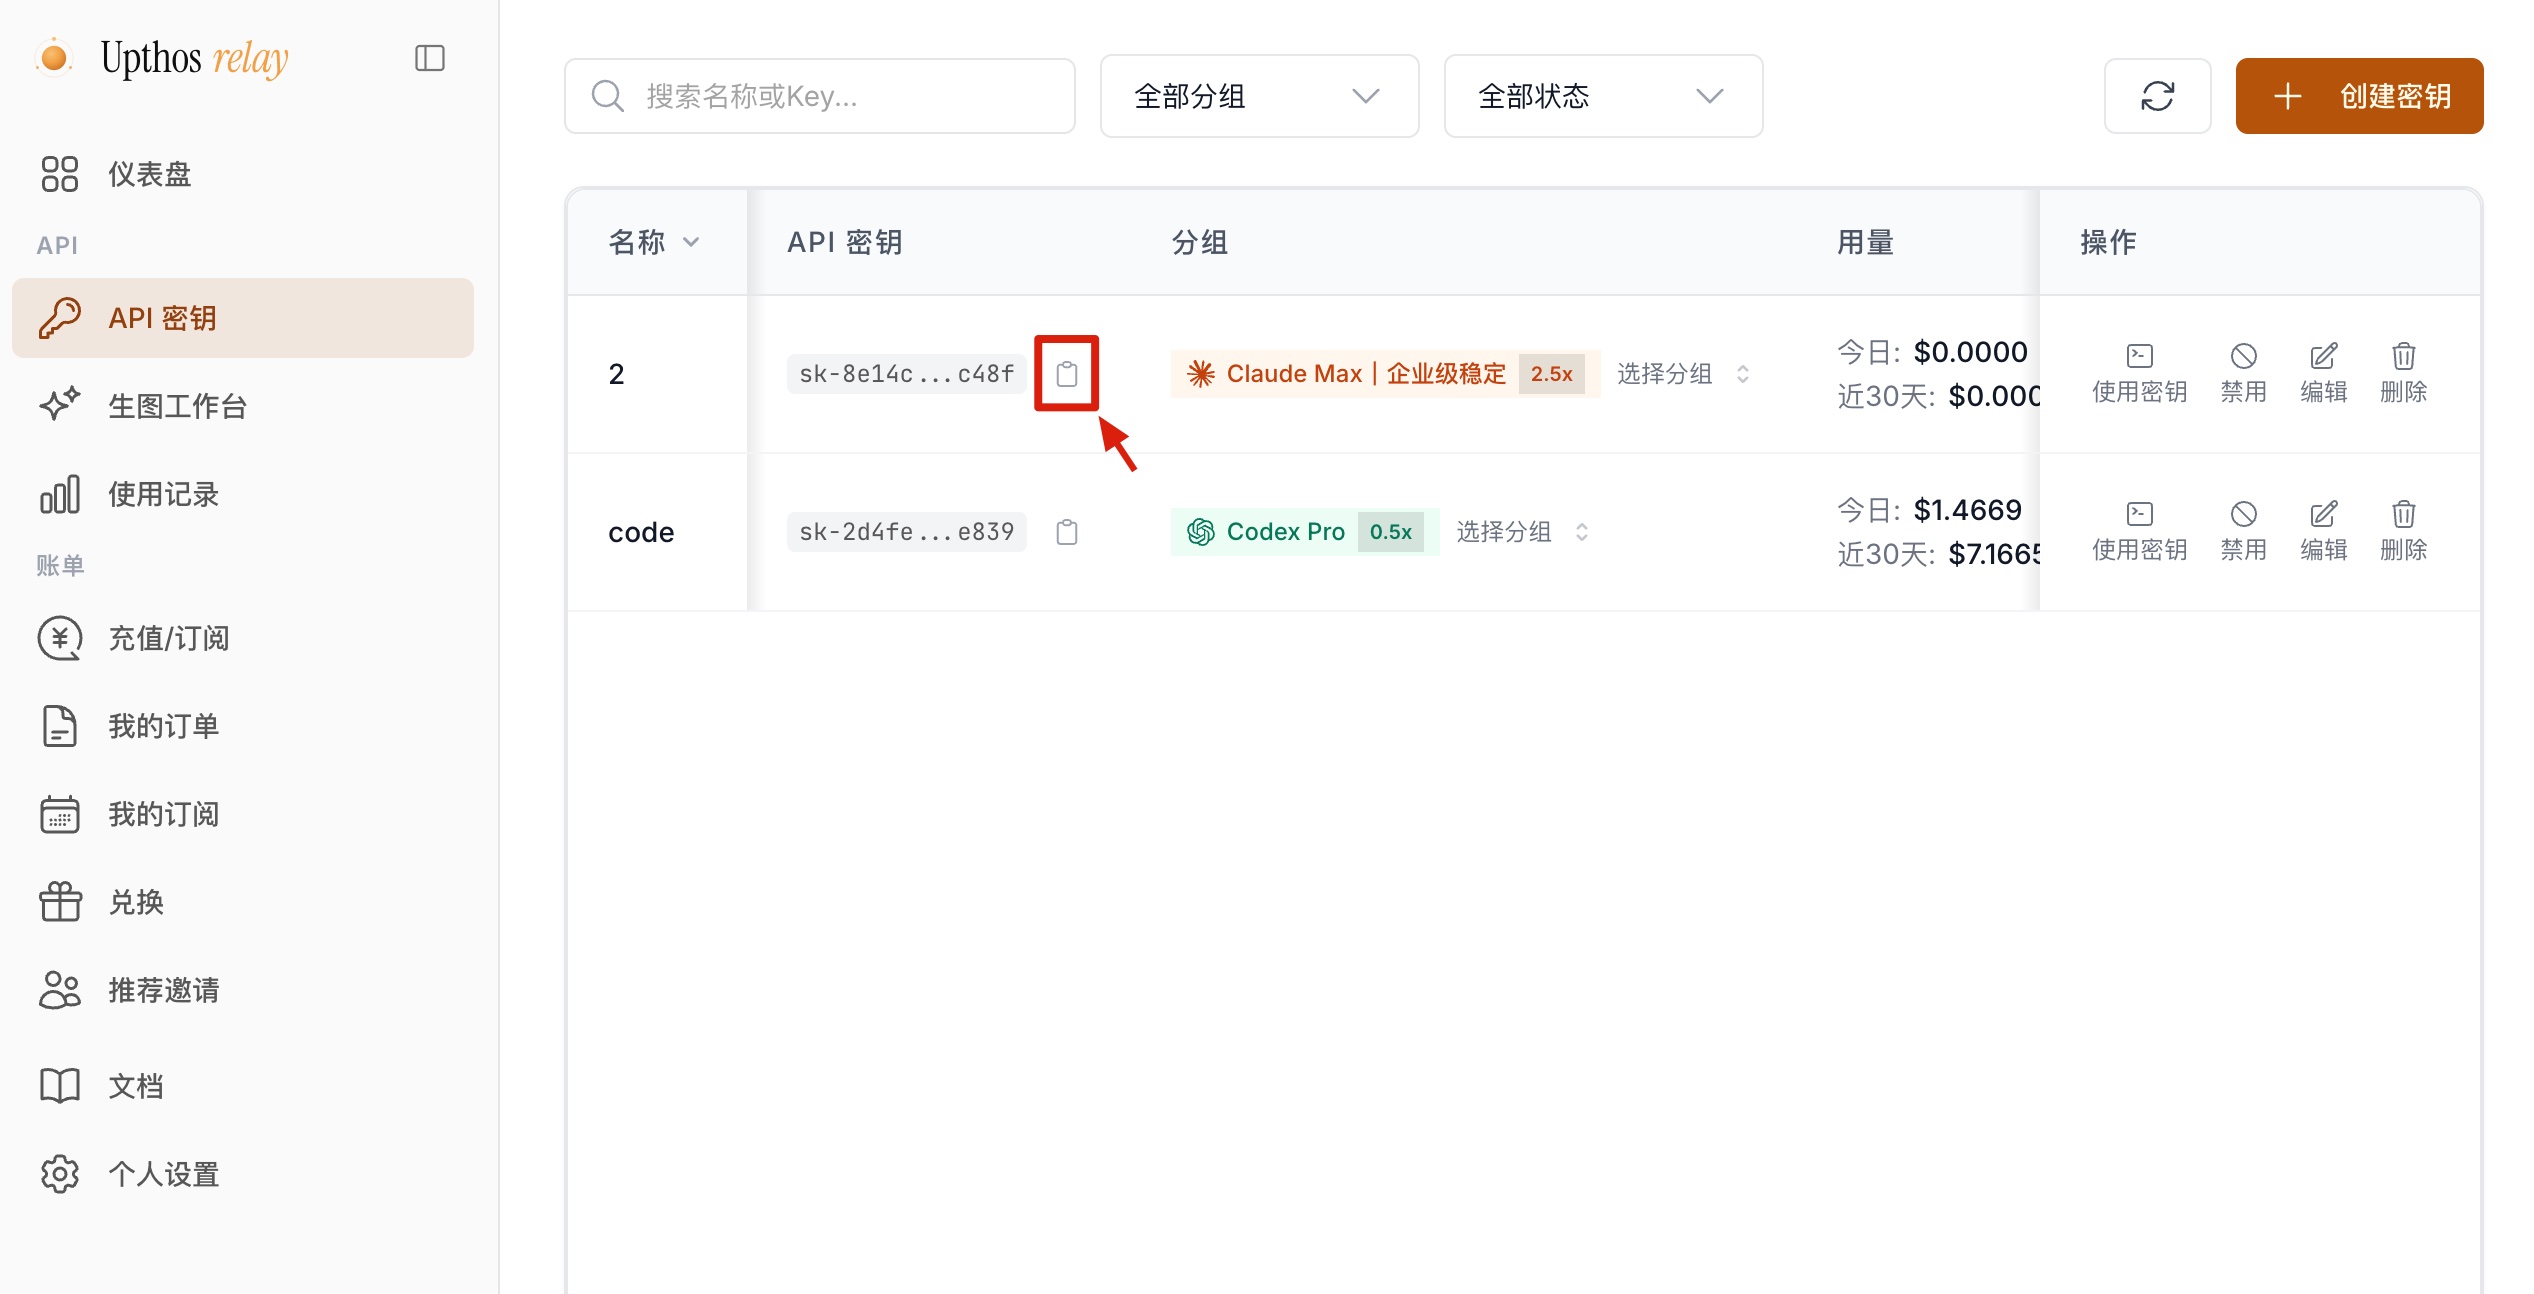
Create auth.json in the same directory, replacing YOUR_API_KEY with your key:
{
  "OPENAI_API_KEY": "YOUR_API_KEY"
}
4. Start Using
Navigate to any project directory and run:
codex
Codex will automatically analyze the code in the current directory and provide intelligent coding assistance. For more usage details, see the official documentation.
FAQ
Q: npm install -g shows permission denied?
A: On macOS / Linux, prefix the command with sudo. On Windows, run PowerShell as Administrator.
Q: codex --version says command not found?
A: Make sure the npm global directory is in your system PATH. Run npm bin -g to check the path and add it manually.
Q: Connection fails or returns 401 error?
A: Verify that base_url in config.toml is set to https://relay.upthos.com and that the API Key in auth.json is correct and not expired.
Q: How to switch between different models or rates?
A: Create keys with different groups in the Upthos Relay Console, update the key in auth.json, or use CC Switch to quickly switch between configurations.